Niro Granite PH - Logo
  • Home
  • About Us
    • About Niro Ceramic Group
    • Why Choose Niro Group
  • Brands
    • Niro Granite
    • Zirconio
    • Portino
  • Products
    • Tiles
      • Niro Granite
      • Portino
      • Lets Visualize
    • What’s Trending
      • Project Reference
      • E-Catalogues
      • Tile Trends 2025
    • Featured Products
      • Big Slab Tiles
      • Slip-Stop Tiles
      • Slim Tiles
  • Ideas
    • Bedroom
    • Bathroom
    • Kitchen
    • Dining
    • Living
    • Outdoor
  • Buzz Hub
    • Articles
    • Design
    • Tile Talk
    • How To
    • Social Feed
  • Contact Us
    • Ask Us Now
    • Offices & Showrooms
    • Tile Request

Big Slab Tiles Installation Guide | How to Safely Install Large Format Tiles on Your Walls

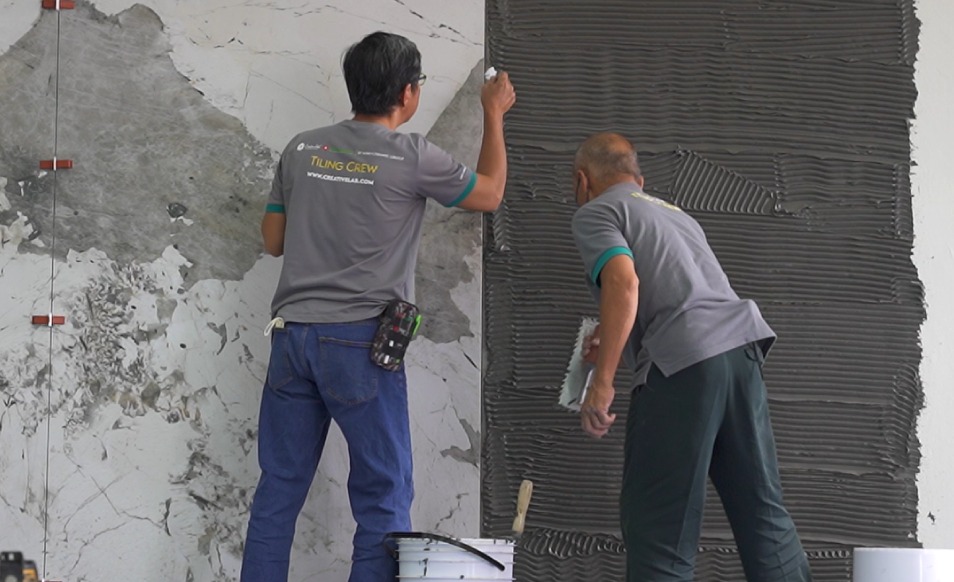
Enchanted by the elegance of large format tiles? Prepared to revamp your space with a stunning feature wall? Before embarking on your project, take a moment to peruse this guide on ensuring a seamless and secure installation.

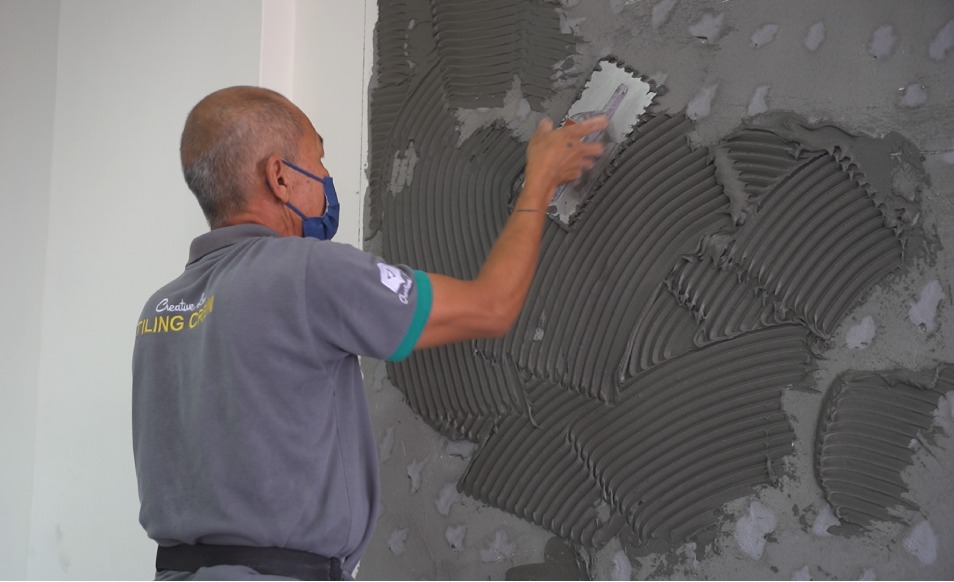
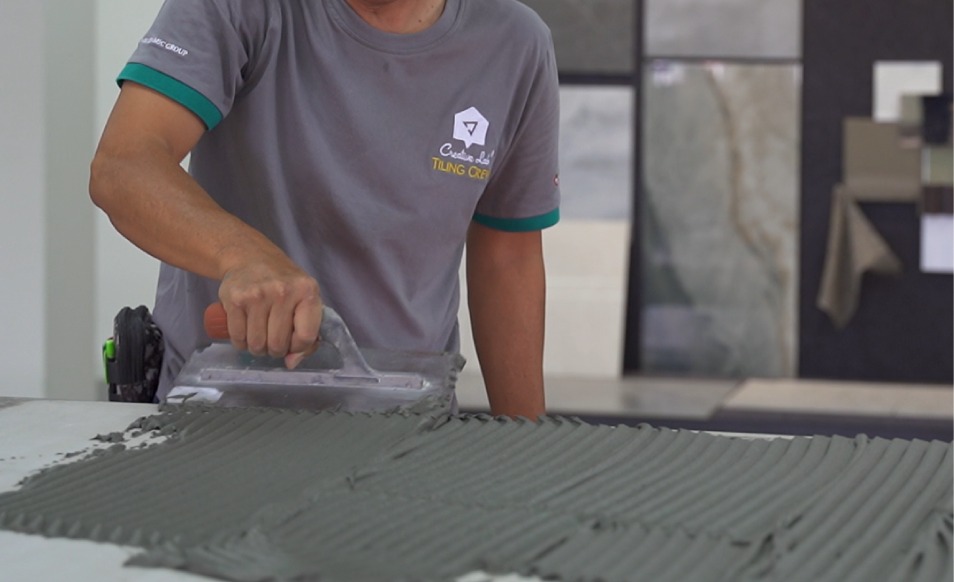
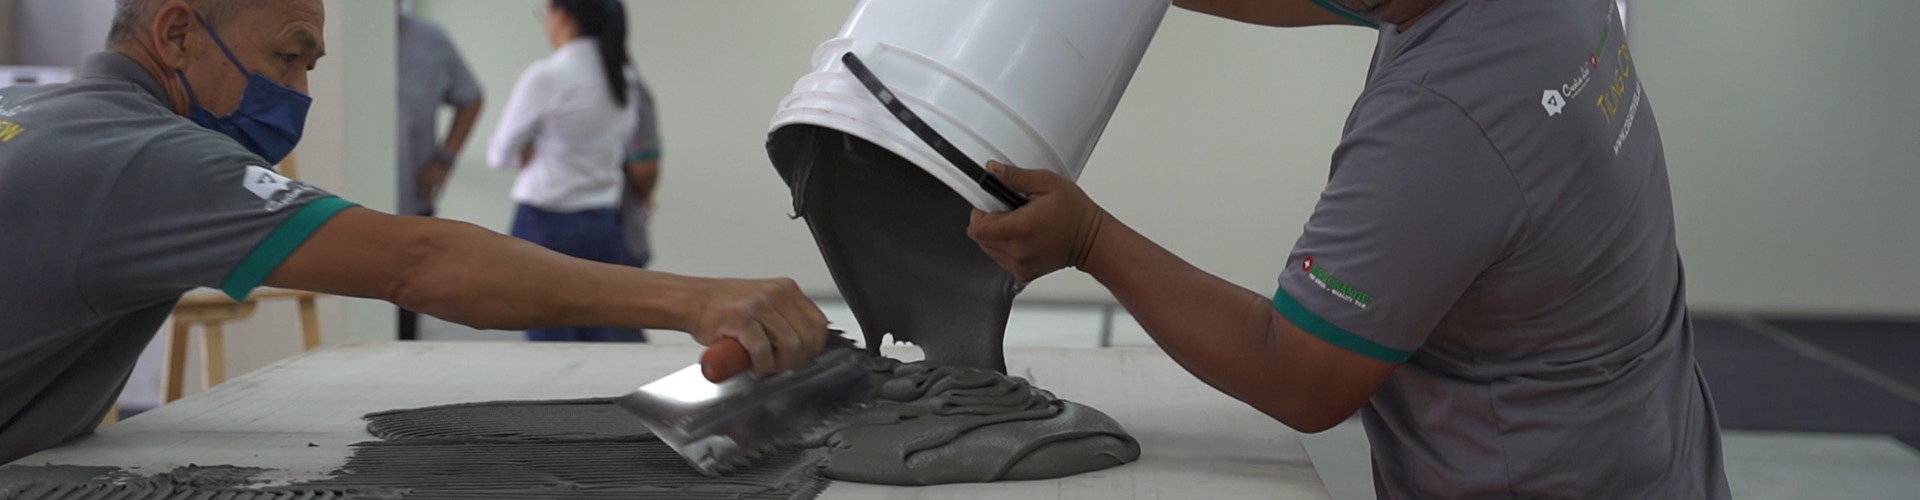
This guide delves into practical steps for the safe and efficient installation of large format tiles on walls, focusing on reducing possible mistakes. Let’s get started:

Zirconio XO Slab brings true continuous design to big slab tiles.

Explore Now
  1. Prepare the proper tools for the installation.
    Before you start your big slab adventure, gather a reliable set of tools. Get a durable carrying rack and a stable cart to manage those large slab tiles, along with suction cups for stability while moving them around.
  2. Prepare the substrate.
    A smooth, level foundation is crucial for a successful installation. Remove any unwanted bumps and level uneven areas to guarantee proper adhesion, preventing future unevenness.
  3. Use suction cups and a carrying rack to transport big slab tiles.
    Using suction cups along with a carrying rack adds an additional level of grip and stability, reducing the chances of accidental slips that could potentially damage large slab tiles.
  1. Spread the mortar adhesive to the underside of the tile.
    Flip the large tile slab upside down, then use a trowel to spread the mortar adhesive from the middle outward, making sure to cover every corner and edge. Precise application is key to establishing a durable and secure bond for your wall tiles.
  2. Spread the mortar adhesive to the prepared substrate.
    Apply the mortar adhesive evenly on the wall surface, following the same direction as your intended tile layout. This method guarantees uniform adhesion, preventing any irregular gaps or weak points.
  3. Place the tile gently onto the installation surface.
    Place the tile onto the substrate with precision using the carrying rack. Once positioned, release the suction cups gently and allow the adhesive to work its magic. This careful placement prevents edge damage and lays the foundation for a perfect final result.
  4. Eliminate air pockets from underneath the tile.
    Before exerting pressure, use a vibrating tool to remove any air pockets trapped under the tile. This will reduce the chances of hollowness once the adhesive sets.
  1. Fill the gaps at the tile edges with more adhesive.
    Fill any gaps between the tile and the wall with extra adhesive, making sure to cover all surfaces. Afterward, remove any excess adhesive from the edges of the tile. This finishing step not only gives a polished, seamless appearance but also serves as a protective shield against moisture, ensuring your installation remains pristine for years.
  2. Place levelling systems between each tile.
    For correct bedding and to remove lippage, it is advisable to utilize leveling systems between every tile that is installed.
  3. Repeat steps as required.
    After setting the initial piece, the next step is to replicate the process for the remaining pieces. Opt for tiles that fit closely together to reduce gaps and achieve a polished, unified appearance.
  1. Allow the adhesive to dry for 72 hours
    Let the adhesive cure fully for 72 hours before handling or cleaning your tiles. Once the adhesive has dried for at least 72 hours, you can remove any excess adhesive from the tile surfaces and edges.
  2. Remove all tile levellers and spacers.
    Carefully take out the tile leveling systems and spacers. Next, use your tools to make sure that the tile gaps are tidy and clear of any debris.
  3. Apply grout.
    Apply grout evenly within the tile gaps. Then, carefully use a damp sponge to wipe the tile surfaces and remove any excess grout.

Looking for more tile installation tips? Speak with us today!

Contact Us
Previous Post
How to Eliminate Tile Hollowness During Installation
Next Post
7 Effective Tips to Lay Bathroom Tiles Seamlessly

RELATED POSTS

Mid-Year Tile Sale - 2025 - Up to 50% OFF

Mid-Year Tile Sale 2025 – May 26 to June 28

5 Reasons to be Transparent about our Environmental Impacts with EPDs

How to Quickly Transform Your Space with Let’s Visualize

The Biggest Tile Trends In 2025

Avoid These 8 Common Mistakes When Tiling

Understanding Anti-Slip Ratings for Residential & Commercial Projects

Slip-Stop Tiles vs. Anti-Slip Tiles: Understanding the Differences

Traditional vs. Modern Tiles: Which One is Right for Your Home?

Recent Posts
Mid-Year Tile Sale - 2025 - Up to 50% OFF
Mid-Year Tile Sale 2025 – May 26 to June 28
5 Reasons to be Transparent about our Environmental Impacts with EPDs
How to Quickly Transform Your Space with Let’s Visualize
The Biggest Tile Trends In 2025
Avoid These 8 Common Mistakes When Tiling
Niro Granite By Niro Ceramic Group
Enter your email address to subscribe and stay updated *
Please enter a valid email address.

NIRO CERAMIC PHILIPPINES, INC.
Unit 102 G/F Bldg. 3 OPVI Centre, 2295 Pasong Tamo Ext. Makati City, Philippines 1231

  • Ideas
  • Bedroom
  • Bathroom
  • Kitchen
  • Dining
  • Living
  • Outdoor
  • Brands
  • Niro Granite
  • Zirconio
  • Portino
  • Buzz Hub
  • How To
  • Design
  • Tile Talk
  • Blog
  • What’s Trending
  • Tile Trends 2025
  • Project Reference
  • E-Catalogues
  • Lets Visualize
  • Find Us
  • About Us
  • Contact Us
  • Offices & Showrooms
  • Legal
  • Privacy Policy
  • Anti Bribery
  • Imprint
Copyright © 2025 Niro Ceramic Philippines, Inc. All rights reserved.

GET YOUR FREE

E-Catalogue Here

We’re just as excited as you are about Big Slab Tiles Installation Guide | How to Safely Install Large Format Tiles on Your Walls! Download the free catalogue now to get some inspirational design ideas.

Fill out this field
Please enter a valid email address.
Are you a Homeowner or a Professional?
Select an option

CATALOGUE CONTACT

Why Niro Ceramic Group

Highest Quality

Swiss heritage with highest standards of quality and good design.

40+ Years Experience

More than 40 years of experience in the tile industry with more than 100 representatives worldwide.

Personalized Experience

Personalized experience from our sales and technical specialists.

Free Drawing and Design

Free 3D designs and technical drawings by qualified interior designers.

Global Supply

Global supply chain to ensure sufficient stocks at any point of time.

CATALOGUE CONTACT

FAQ

We send a copy of the e-catalogue to your email so you could view it again anytime or in case technical glitch happens and you can’t view it here.

Please contact us and our team of specialists will get back to you within one working day.

Share

Blogger
Bluesky
Delicious
Digg
Email
Facebook
Facebook messenger
Flipboard
Google
Hacker News
Line
LinkedIn
Mastodon
Mix
Odnoklassniki
PDF
Pinterest
Pocket
Print
Reddit
Renren
Short link
SMS
Skype
Telegram
Tumblr
Twitter
VKontakte
wechat
Weibo
WhatsApp
X
Xing
Yahoo! Mail

Copy short link

Copy link
This website uses cookies to improve your experience. If you continue to use this site, you agree with it. Privacy Policy